Thursday, May 17, 2012

Mint Chocolate Birthday Cake

After tasting the scraps of a mint chocolate pound cake that I made and gave away, Bill can't stop talking about it. So when planning his birthday cake, I immediately started looking for a mint chocolate recipe that would go well with frosting. Of course, Martha Stewart has a recipe for everything.


This cake recipe is accompanied by a Swiss Meringue Buttercream recipe. This is not the first time I had attempted a frosting with heated meringue, but I had failed many times before. So this time, I studied up on it. This post changed my world. 


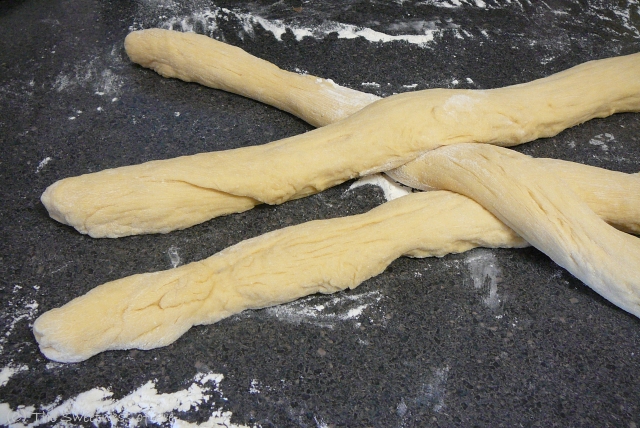
I wanted to add sea creatures around the cake, so I looked up how to make fondant. This marshmallow fondant didn't seem too hard. There's even a video that shows how to color fondant.


Here's a the adapted recipe from Martha, to make two 8 inch wide chocolate cake layers and one 6 inch wide mint cake layer:

Layered Mint Chocolate Birthday Cake
1/2 cup cocoa powder
1/2 cup hot tap water
3/4 cup sour cream, separated
3 cups all-purpose flour
1 tsp baking soda
1/2 tsp salt
1 1/2 cups (3 sticks), softened
2 1/4 cups sugar
4 large eggs
1 tbsp vanilla extract

Preheat oven to 350 degrees. Prepare baking pans by buttering the pans and line with parchment paper. Whisk cocoa powder and hot tap water in a small bowl. Mix in 1/2 cup sour cream.


Combine flour, baking soda, and salt in a medium bowl. Mix well.

In a stand-mixer cream butter with sugar with the paddle attachment on medium speed until light and fluffy. Mix in eggs one at a time. Beat in the vanilla. On low speed, add the flour mixture in three batches. Take out 1/3 of the batter and keep it a large bowl. Mix in the chocolate mixture on low speed with the rest of the batter until just combined. Divide into two 8-in cake pans.

Add the rest of the sour cream in the bowl containing the batter left on the side. Add 1 1/2 tsp peppermint extract. Mix on low speed, add green food coloring one drop at a time until the desired color is achieved. Pour batter into a 6-in cake pan.

Bake for 40 minutes in the middle layer, rotate pans every 20 minutes, or until a toothpick comes out clean. Cool completely before cutting into layers and icing.


After the cake is built and iced, when you cut into it, it looks like this.


Makes good large slices and small slices.


The frosting gave me quite a scare at first. I thought I was going to have to throw away another batch of Swiss Meringue Buttercream. It was liquid-y, even after I added all the butter, but I turned the mixer up with the paddle attachment and after five minutes, it all came together, just like Sweetapolita promised.


The marshmallow fondant was a lot of fun, and a lot easier to make and work with than I expected. You can make a few primary colors and knead the different colors together to create new colors, just like play-doh! They hold up well if you want to do any modeling and they taste just like marshmallows!


This cake can be kept at room temperature as long as you use parchment paper to cover the parts not covered by frosting, then cover the cake with a cake cover or plastic wrap. I'm so happy this cake came together, and I can't wait to make another birthday cake!


Tuesday, May 15, 2012

Let's Go Fishing Cake ~ Happy Birthday Bill!

Today is Bill's birthday! I decided to make a two-tiered cake. Since fishing is Bill's new obsession, I thought a fishing cake would be really fun. This cake from a google search was my inspiration.

This is the first time I've made a cake with multiple tiers, fondant cutouts, and Swiss meringue buttercream. I was beyond surprised and absolutely pleased everything came out without a hitch.

I've never made marshmallow fondant or a successful batch of Swiss meringue buttercream before. It was very nerve-wrecking when I started, but so thrilling when everything came together. I'll go over the recipes tomorrow because I just can't wait another day to share with you the fun part of building the cake!


First I started with chocolate cake layers.


Building it up one by one.


The top two layers are mint flavored, so I colored them green.


Cover the entire cake with plain frosting.


Then layer with colored frosting. Most of the cake represents the water, so there's a lot of blue. I think this could also be a good start for a Tiffany cake. Or a "It's a boy!" cake. Maybe some day. In the future :)


On the top tier, there is a patch of grass. For the fisherman to stand on, of course.


Seaweed lines the bottom of the sea.


Top-down view


And then it was time for some fun sea creatures. I wrecked my brain trying to come up with sea creatures that can be cut out with butter knifes. I came up with Goldfish, starfish, and seashells.


I started with a selection of marshmallow fondant I've colored with food coloring gel. They look like play-doh, don't they? My play-doh experience really helped me out here. The takeaway lesson is playtime is not just a waste of time. Remember that, future-me.


Roll them out and cut the sea creatures. Then I made this little man. It's constructed with a toothpick inserted down its core. All of my "research" on the food network came in handy. The takeaway lesson here is that TV is also not a waste of time. Go head, play with play-doh and while you watch TV, future kids!


The fishing pole is made with a toothpick and a piece of thread.


The little fisherman blew out the candles.


Happy birthday my dear husband! May all your fishing wishes come true!


Monday, May 14, 2012

Ready for Summer! Bruschetta

Summer solstice is a month away, but we are ready for summer now! The bees are buzzing about, and the pair of resident Canada geese has been circling the building in search for food. I'm hoping we will see some chicks in a couple of weeks.

This past weekend was hot and sunny. I took out my giant sun hat and visited a local garden center with Bill. We got a bunch of flowers to spruce up our balcony. In addition to flowers, we also got basil, "mojito" mint, and catnip--before it had a chance to take root my cat already bit off a piece! With our balcony filled with plants, our fingers are crossed for an aphid-free summer.

When it gets hot out, there's nothing like a refreshing drink with homemade appetizers. Bruschetta is always appetizing and a crowd-pleaser. It just brings out all the flavors of summer. You can use homemade or store-bought baguette. Stay tuned for a post on homemade baguette!


Ready for Summer Bruschetta
Makes 4 servings

3 cups various tomatoes (roma, cherry, grape), chopped
2 tbsp fresh basil, chopped
2 tsp balsamic vinegar, chopped
2 tbsp extra virgin olive oil
2 garlic cloves, chopped
Salt & pepper
1 baguette, 3/4 in to 1 in slices
1 garlic cloves, peeled
1/4 cup grated mozzarella
1/4 cup grated Parmesan

Preheat the oven for broiling. Combine tomatoes, basil, vinegar, olive oil, garlic in a medium bowl. Add salt and pepper for taste. Leave the mixture for 20 minutes for the flavors to set in.


Broil baguette for two minutes. Keep a close watch so they don't burn. Rub garlic clove on both sides of bread slices.


Top tomato mixture on bread. Sprinkle mozzarella and Parmesan over the tomatoes. Broil for a minute until cheese is melted. Bon appetit!


Tuesday, May 8, 2012

Bread of the Week: Challah

I love making knotted and braided breads. This is the second time I made challah, first time post, from The Bread Baker's Apprentice. It's the bomb.


My sister was visiting last weekend. While she caught up on sleep, I prepared the dough for rising. Whisk eggs, oil, and water together.


 Add it to flour, sugar, salt, and yeast mixture. Mix with a paddle attachment until it combines then knead with the dough hook.


Once the dough has risen a couple times, combined time two and a half hours, we rolled them into three boules. Let them rest for ten minutes.


Then rolled them out. I missed the book's tip to leave the ends skinnier than the middle to make the most visually appealing challah, so we actually braided it twice.


My sister and I each braided one side.


Brush with egg whites and let it rise on parchment paper for 45 minutes to an hour (our apartment tends to be cool). Bill, my sister, and I took that time to go to the hot yoga studio. Family yoga time.


Usually this recipe book lists a range of time it takes to bake the bread depending on your kitchen. Our oven seems to be leaning towards the hot side, so I would set the timer for the minimum amount of time needed. This time, however, the challah took much much less time than the recipe suggested. Only 25 minutes. I left it in the oven for three more minutes after it was golden brown to make sure the insides are baked through.


Not only is it good to snack on it plain, have it with butter accompanied by eggs and bacon, it's the best BEST bread for french toast.


So much for bread of the week. We have only two slices left after the weekend!

Saturday, May 5, 2012

Saturday Morning Challah French Toast

This is an exciting weekend. The weather is getting nicer and my sister is visiting! We went to the circus and made challah bread together. The natural progression is french toast for breakfast!

Last time we saw each other in NYC, I found this little cookbook at Strand that I love. It's got great pictures and instructions. And mouth-watering recipes, including Vanilla Challah French Toast.

This is by far the best french toast recipe. Challah bread makes all the difference. Stay tuned for a post on homemade challah bread.


Challah French Toast
Makes three servings
Adapted from Perfect Jewish

6 large slices of challah about 3/4 in. thick
3 eggs
3/4 cup milk
1/2 cup orange juice
1 1/2 tbsp sugar
1 tsp salt
1 1/4 tsp vanilla extract
2 tbsp butter

Whisk eggs milk, orange juice, sugar, salt, and vanilla extract together in small bowl. Transfer the mixture to a medium size dish or baking pan. Soak bread slices 2 minutes on each side in batches. Heat butter on frying pan over medium heat. Fry bread slices on each side for 2 minutes.


Dusted with powdered sugar and served with strawberry and maple syrup.


Thursday, May 3, 2012

Banana Cupcakes with Honey Cinnamon Frosting

Giving presentations is nerve-wrecking. After years of practice, I'm ok when speaking up in class or a work meeting as long as I'm seated. Once I stand up though, my brain goes blank and it takes me a lot of concentration to understand what I'm saying. It's like my mouth doesn't connect with my brain.

Then I had an idea. A really good idea. I'm going to bring cupcakes to calm my nerves. You see, by starting the presentation talking about cupcakes, I know everything will be better.


Coincidentally, I saw this recipe on NYTimes for easy homemade cupcakes and thought that's the kind of recipe for me!


I even made little flags for The Sweetness of Pie. What do you think?


The carrot cupcakes are from flour. The carrot coils are a little tricky but turned out pretty neat.


My scheme worked out...the presentation went well. The cupcakes were well-received. And the professor said he thought they even generated better discussion. Cupcakes rock!