Well, it has been a while. I will try not to neglect my little blog so long next time. Get sneak peeks for what's coming up by subscribing to The Sweetness of Pie on facebook!
Summer has passed by us quickly. It took our tomatoes the whole season to grow on an apartment balcony. We now have three ripe tomatoes. The rest are still pretty green and it's getting chilly out. Some people suggested harvesting them and leaving them on the counter. Other people suggested a green tomato pie. You know how much I like pies. There's no need to guess which route I chose.
The recipe I used is a simple one. It's very much like an apple pie recipe. The cooked green tomatoes tasted to me like plums.
Green Tomato Pie
Crust: from JoyofBaking
2 1/2 cups all-purpose flour
1 tsp salt
1 tbsp granulated sugar
1 cup (2 sticks) butter, chilled
1/2 cup ice water
Filling: from About.com Southern Food
6 medium to large green tomatoes, quartered and sliced
grated peel from 1 lemon
juice from 1 lemon
1/2 tsp salt
1/4 tsp ground cinnamon
3/4 cup granulated sugar
2 tbsp cornstarch
1 tbsp butter
1 tbsp milk
Demerara sugar for sprinkling
Pulse the flour, salt, sugar, and butter in a food processor until it resembles coarse cornmeal. Add ice water and pulse until it comes together into a ball. Form into two disks, wrap it in plastic wrap and chill for 30 minutes in the fridge. My tiny 2 cup food processor processed this twice to make two disks.
Preheat the oven to 400 degrees. Cook tomato slices, lemon peel, lemon juice, salt, and ground cinnamon in a medium saucepan over low heat. Combine sugar and corn starch and stir into the mixture. Cook about twenty minutes, or until tomatoes are softened and filling has a thick consistency. It never really turns clear for me. Add butter and remove from heat.
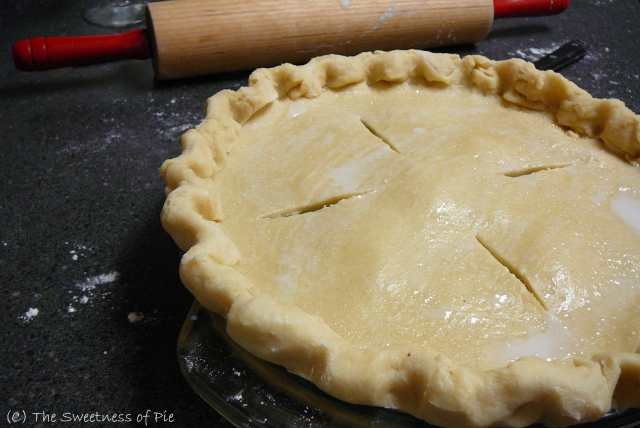
Roll out the crusts for a 9-inch pie pan. Pour in the filling, top with crust. Cut slits and brush the top of the pie with milk and sprinkle with
Demerara sugar. Bake for 35 to 45 minutes until the crust is golden brown. Cool for an hour before serving.
Served with vanilla ice cream. I hope you enjoyed this post! Until next time!
Wednesday, September 26, 2012
Saturday, September 1, 2012
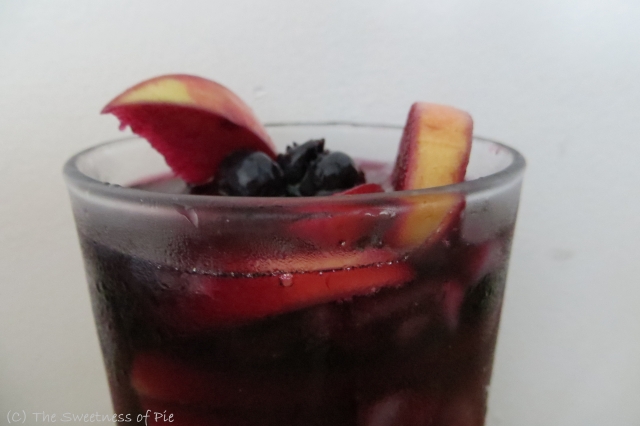
Guest Blogger: Serena's Summer Sangria
Hi There! This is Serena, Shirley's sister. This drink is an all-around excellent drink for all of summer. From escaping the smoldering summer heat to the end of the season when you want to savor the very last bit of it. This sangria recipe is slightly adapted from Emeril Lagasse.
Summer Sangria
Serves 6
1 bottle (750 ml) brandy
1 bottle (2 liter) wine
5 lemons, sliced
1 pint blueberries
1/2 pint strawberries, whole
4 medium green apples, sliced
1/4 cup raisins
1/2 cup agave syrup, more for sweetness
Ice for serving
Sparkling water for serving
Mix lemons, blueberries, strawberries, green apples, and raisins in a large bowl. In another large bowl, add one layer of mix, drizzle 2 tablespoons of agave sugar. Repeat three more times until all the fruit and agave sugar are mixed. Pour in brandy and wine. Marinate for at least 24 hours. Serve with ice and sparking water.
Summer Sangria
Serves 6
1 bottle (750 ml) brandy
1 bottle (2 liter) wine
5 lemons, sliced
1 pint blueberries
1/2 pint strawberries, whole
4 medium green apples, sliced
1/4 cup raisins
1/2 cup agave syrup, more for sweetness
Ice for serving
Sparkling water for serving
Mix lemons, blueberries, strawberries, green apples, and raisins in a large bowl. In another large bowl, add one layer of mix, drizzle 2 tablespoons of agave sugar. Repeat three more times until all the fruit and agave sugar are mixed. Pour in brandy and wine. Marinate for at least 24 hours. Serve with ice and sparking water.
Thursday, August 30, 2012
Peaches n' Cream Pop
Are you sad summer's coming to an end? Make some peaches n' cream pops to savor the end of summer!
Makes 3 pops
1 peach, pit removed
2 tbsp cream
1 tbsp milk
1 tbsp honey
Slice peach. Blend all ingredients in a food processor. Pour into Popsicle container and set in freezer until frozen.
Sunday, August 19, 2012
Strawberry Rhubarb Pie and Lessons Learned
This is my first time making strawberry rhubarb pie! They say this is an old time-y pie, but I don't remember ever eating one. Perhaps I have once or twice, but they didn't stick in my memory.
But many people have told me it's their favorite pie. Since my in-laws had rhubarb growing in their suburban garden, I figure this is a good opportunity to try baking one myself.
I adapted the recipe from Epicurious, with only 2 cups of cut rhubarb and milk instead of egg for glazing. I also had about a quarter of the pie dough left in the end.
The strawberry was from the market.
The pie was delicious but I had some issues with the crust. I learn best by doing. So here are my lessons learned.
(1) Cut butter in the flour first, then add vegetable shortening. If you're not using a food processor and are manually cutting in the butter and vegetable shortening, the different consistencies tend to leave the butter in large chunks.
(2) Leave only one inch or less overhang on the bottom crust. Otherwise the crust will sag in the oven. But build the edge up taller than the pie pan so it doesn't shrink too much.
(3) Make larger crimps when working with a crust made with vegetable shortening. Because the crust will expand and smaller decorations tend to lose shape.
(4) Cool pie completely before covering. Otherwise the condensation will make the crust soggy.
(5) Strawberry rhubarb pies are so yummy! Make more!! Whatever issues I had with the crust didn't matter, because in the end, the pie was delicious and we got to share it with our friends at the church picnic.
And eat more pie everyone! Until next time~
But many people have told me it's their favorite pie. Since my in-laws had rhubarb growing in their suburban garden, I figure this is a good opportunity to try baking one myself.
I adapted the recipe from Epicurious, with only 2 cups of cut rhubarb and milk instead of egg for glazing. I also had about a quarter of the pie dough left in the end.
The strawberry was from the market.
The pie was delicious but I had some issues with the crust. I learn best by doing. So here are my lessons learned.
(1) Cut butter in the flour first, then add vegetable shortening. If you're not using a food processor and are manually cutting in the butter and vegetable shortening, the different consistencies tend to leave the butter in large chunks.
(2) Leave only one inch or less overhang on the bottom crust. Otherwise the crust will sag in the oven. But build the edge up taller than the pie pan so it doesn't shrink too much.
(3) Make larger crimps when working with a crust made with vegetable shortening. Because the crust will expand and smaller decorations tend to lose shape.
(4) Cool pie completely before covering. Otherwise the condensation will make the crust soggy.
(5) Strawberry rhubarb pies are so yummy! Make more!! Whatever issues I had with the crust didn't matter, because in the end, the pie was delicious and we got to share it with our friends at the church picnic.
And eat more pie everyone! Until next time~
Sunday, August 12, 2012
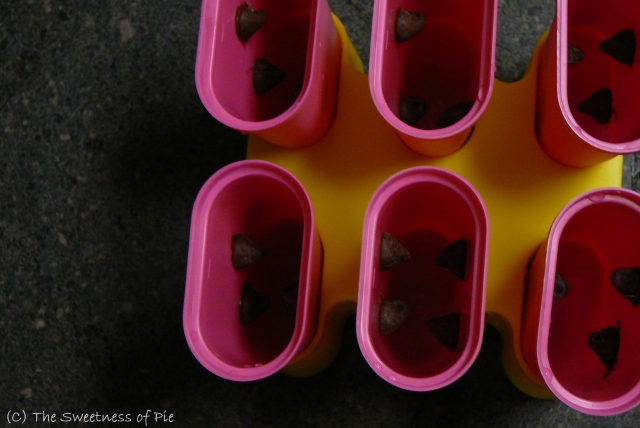
Watermelon Popsicle
I can't believe it's the middle of August already. Before the summer slips by me, I want to make something summer-y. These recipes for grownup pops came at just the right time. I made the watermelon pops using honey and vanilla yogurt.
Watermelon Pops
Adapted from NPR
Watermelon Layer
8 oz watermelon (about 15 1 in. cubes)
2 tbsp vanilla yogurt
1 1/2 tbsp honey
1 1/2 tbsp fresh lemon juice
18 semisweet chocolate chips
Lemon Layer
3 tbsp milk
3 tbsp water
1 1/2 tbsp fresh lemon juice
1 1/2 tbsp honey
yellow food coloring
First strain the blended watermelon. Whisk in vanilla yogurt, honey and lemon juice. Set aside. Stir together ingredients for the lemon layer and add enough yellow food coloring to achieve desired color.
Heat up a small frying pan. Take it off the stove. Use chopsticks or tweezers to pick up one chocolate chip at a time and set it on the frying pan for 1-2 seconds to melt the bottom. Stick it on the inside of the popsicle container carefully. If melted chocolate gets on the sides of container wipe it off. Stick about 3-4 chocolate chips in each container.
Pour in the watermelon layer until about an inch from the top. Set in the freezer until the top layer has a thin layer of ice, about two hours. Pour in the lemon layer and insert the popsicle stick. Freeze until solid.
I find they are much easier to remove if they are set in a bowl of water for a couple of minutes before serving. Enjoy on a hot summer day!
Watermelon Pops
Adapted from NPR
Watermelon Layer
8 oz watermelon (about 15 1 in. cubes)
2 tbsp vanilla yogurt
1 1/2 tbsp honey
1 1/2 tbsp fresh lemon juice
18 semisweet chocolate chips
Lemon Layer
3 tbsp milk
3 tbsp water
1 1/2 tbsp fresh lemon juice
1 1/2 tbsp honey
yellow food coloring
First strain the blended watermelon. Whisk in vanilla yogurt, honey and lemon juice. Set aside. Stir together ingredients for the lemon layer and add enough yellow food coloring to achieve desired color.
Heat up a small frying pan. Take it off the stove. Use chopsticks or tweezers to pick up one chocolate chip at a time and set it on the frying pan for 1-2 seconds to melt the bottom. Stick it on the inside of the popsicle container carefully. If melted chocolate gets on the sides of container wipe it off. Stick about 3-4 chocolate chips in each container.
Pour in the watermelon layer until about an inch from the top. Set in the freezer until the top layer has a thin layer of ice, about two hours. Pour in the lemon layer and insert the popsicle stick. Freeze until solid.
I find they are much easier to remove if they are set in a bowl of water for a couple of minutes before serving. Enjoy on a hot summer day!
Subscribe to:
Posts (Atom)